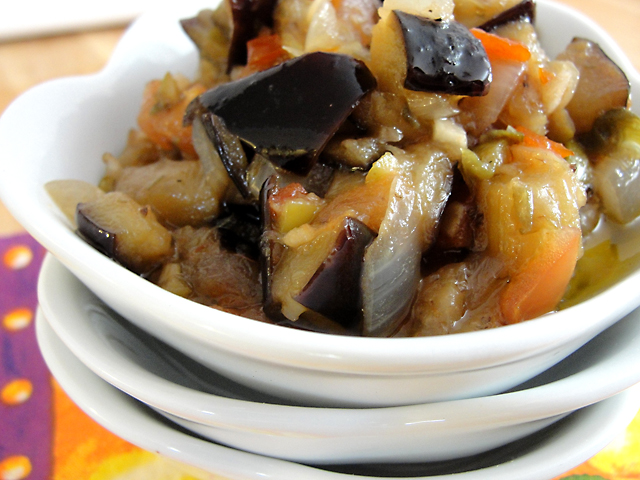
La Nonna’s Sweet and Sour Eggplant Dip

My paternal nonna (grandmother) was the quintessential Italian cook.  She was short, a bit on the round side and everything she cooked in her kitchen was Italian, even after living in a Latin American country for over 30 years.  I always thought she missed Italy so much, that was the only way she could stay connected to the mother country - By refusing to change her cooking style and adapting new ways.  She stayed true to her Italian ways.

And that is how I learned to cook Italian food.  The old way.

We use to spend most of the summers with my grandparents.  To me it was 3 whole months of cracking eggs, baking, stirring, cutting and writing down the recipes to take back home as my nonna cooked them up.  She never cooked with precision, it was always a “Little of this.. a dash of that”.  My 20+ year old cookbook still has those recipes, meticulous written in my 11 year-old handwriting and with little doodles and markings all over the margins.  Most of the ingredients are written in Spanish and Italian, because that is how she will be dictating them back to me…

“dos melanzana es sufficiente” 
Translation: “two eggplants is enough”

“una cebolla, tritatta piccolina”
Translation: “one onion, cut up very small”

And on and on. 

I do miss cooking in that kitchen. My love of cooking comes from these lessons.

She was knows for tons of signature dishes.  And their ranking order was establish by how many people in the family would request them and how often.

This eggplant dip was one of my favorites.  Even at that young age, with all the grown up ingredients, I loved this dip.  It’s perfect to eat with toasted bread, or smoother on French bread or on top a steak, or mix into scramble eggs.  As you can see the application is endless.  It’s not a complicated recipe, and as always in Italian regional cooking, simplicity rules the day.  Plus it keeps well in the refrigerator, which gives me an excuse to make a big batch and eat it for days.

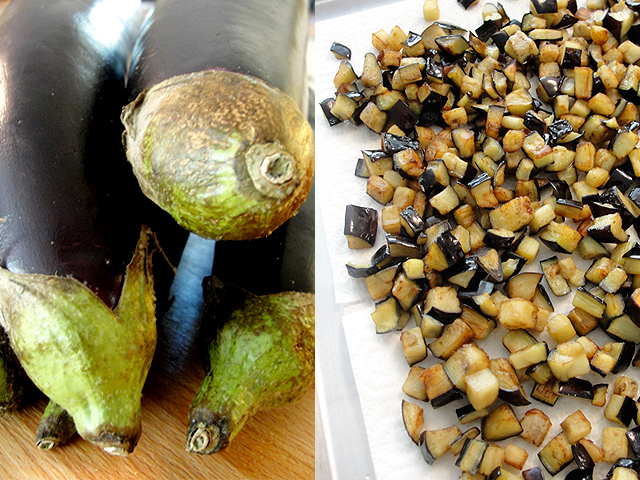
The only tip I can give you on this is the type of eggplant to use.  You can use any type of eggplant. But, I like the Chinese or Indian variety.  Mainly because they are both sweeter and tender than the American eggplant, helping the dish hit its sweet & sour point to its full potential.
Ingredients
(enough for about 4 or a small jar)

2 Eggplants (if using the big American variety) if using the Indian or Chinese, you will need about 5 or six.
1 to 2 cup of olive oil
2 medium yellow onions
2-3 tomatoes chopped
3-4 cloves of garlic, chopped
2 tablespoons of drained capers, rinsed and chopped
3 tablespoons of pitted olives, chopped
¼ cup of red wine Vinegar (you may use less than this)
¼ cup of sugar (you may use less than this)
Salt and Pepper to taste

Cut eggplant into small cubes (about ½ inch) and transfer to a colander. Toss with 2 teaspoons of salt. Let drain 1 hour.

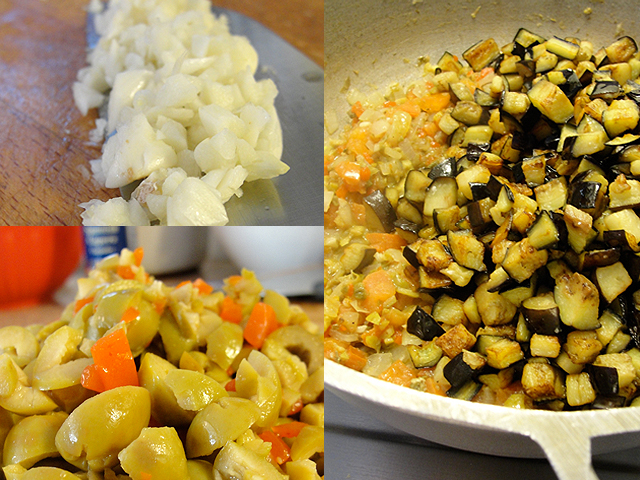
While waiting for the Eggplant, prep your other ingredients by chopping your onions, tomatoes, garlic, capers, olives and measuring your vinegar and sugar.  Put everything aside.

After an hour, gently squeeze (I use a potato ricer to do this task) eggplant to remove excess moisture and pat dry (they need to be very dry). Heat about 1 ½ cup of the oil in a heavy skillet over moderately high heat until very hot.  You can test the oil by adding one of the eggplant cubes, if it rapidly bubbles up, the oil is ready. Fry the eggplant in batches (don’t crowd the pan, you want the eggplant to crisp up) stirring and turning constantly with a slotted spoon, until browned and tender, 3 to 5 minutes per batch. Transfer to a tray lined with paper towels to drain and cool.

Pour off all but 2 tablespoons oil from skillet, then reduce heat to moderate and cook onion, until translucent.  Add the garlic and cook until golden, season with salt and pepper, stirring occasionally, about 5 minutes of so.

Add the eggplants and tomatoes and stir to coat. Then add the olives, cappers and cook for about 2-3 minutes more to mesh all the flavors together.

Now the tricky part, building the sweet and sour flavor.

I usually start by adding the vinegar and sugar in increments of 1 tablespoon at a time, stirring and cooking for about 1-2 minutes after each addition and tasting it as you go along until you get the right amount balance to your taste. I’m also at the same time, adjusting the salt and pepper if needed.
Remember taste, taste and taste some more, as you are cooking along.

Once you find that right sweet and sour punch, simmer uncovered, stirring occasionally for about 15 more minutes.  Cool to room temperature and served.

You can also store it in a jar and chill in the refrigerator.  It usually keeps up to a week.

In my house, we finish this up by the third day, we cannot seem to keep it around for much.

Some notes: 

  • Go easy on the seasoning of the salt, since you salted the eggplants during the soaking period. And the Olives and cappers are already on the salty side… so make sure you taste each step of the way.
  • You can replace the red-wine vinegar with Balsamic, but you need to reduce the sugar as well.
  • You can also add herbs to it, like oregano, or thyme.  Be sure to do this as the last step.
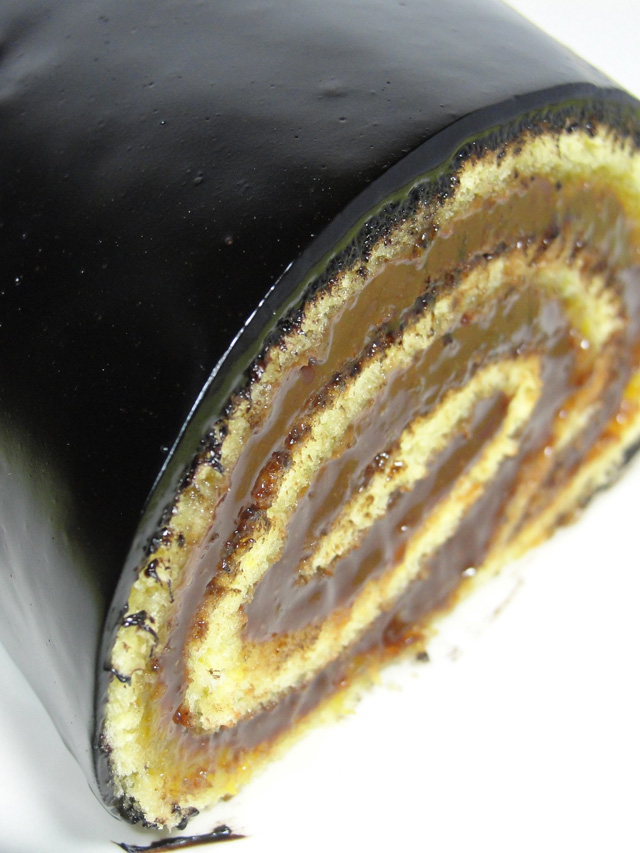
HCB: Chocolate Apricot Roll with Lacquer Glaze

I thought I was going to have to pass this cake by this week.  

For the past 2 weeks, Tom and I have been hosting family that has been running away from the freezing weather up north and I been cooking up a storm – frankly I needed a break from my kitchen.

So I have no explanation as to why during my shopping trip for tomatoes and basil, I took a package of dry apricots and put it in my basket. I’m thinking that it was my subconscious that had the shopping list on my head for this cake since I read about it once it was posted in the list (Can you tell I’m a planner?).

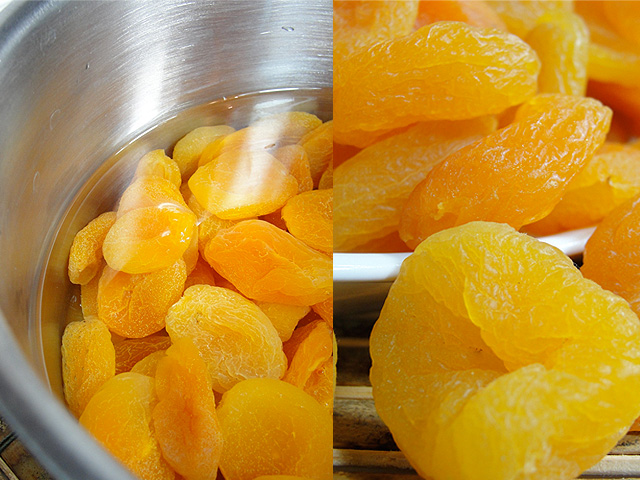
So on Thursday, while making the fresh pasta for the lasagna, the eggplant dip and the Bolognese sauce I came across the apricots and said, why the hell not.

And soaking they went.  My reasoning was that even if I did not make it this weekend, I could start with the Lekvar (Apricot jam), save it and double up next weekend and put forth two cakes!

By Saturday, it was definite that I was NOT going to do this. 

On Sunday, after a huge amount of bad TV, I had a light bulb moment and talked my way into the kitchen, where before I knew it, I had pulled the book out and started to set the ingredients that I would need to complete the roll.

You would think that a roll will not be complicated, but with 5 pages long of instructions and basically 4 different steps to have the necessary components it was an undertaking.  But, after making it I realized that it was just lots of steps, but not difficult ones.  And after 2 weeks of "easy" cakes, I welcome the challenge.

I started with reading the recipe all over again.  Because, you know, sometimes “we miss” things. (Keep that statement in mind).

I padded myself on the back for having completed the Lekvar ahead of time on Thursday night, and while I could have gone with buying an apricot preserve, Tom convince me that the whole point of joining the club was to expand my baking horizon right?

Well, I’m so glad that I made this because the Lekvar was yummy-luscious. I followed the instructions to the letter and the only variation that I did here was that I also include a bit of lime zest (yes, we eat a lot of limes in my house) and that addition gave it a tart flavor profile that I totally loved. I have a feeling we are going to be eating this as much as we did the Orange curd.

The actual roll, or let’s just be fancy and call it by the “posh” name: “biscuit roulade”, was pretty straight forward.  Eggs, beaten with the sugar, in goes the vanilla extract, folding of flour and then whisk the eggs white to luscious peaks and fold that in as well.  Spread it on a baking sheet.  The only oh-oh moment was when I was pouring the batter unto the baking sheet and  thought I was not going to have enough to cover the whole sheet, but as always, Rose’s measurements were accurate and sure enough the whole pan got covered as it should.

Note to self: NEVER QUESTION THE MEASUREMENTS!

The bis-KWEE was ready in 8 minutes, and out it came, where I flipped it on a kitchen towel, removed the parchment paper and dusted the top with powdered sugar and rolled it snug as a bug in a rug.

Next up the apricot ganache and that was made pretty fast.  I used 60% chocolate, I raided my liquor cabinet and found that I had peach brandy in there (who knew!) so in it went and then I put it aside to cool off, after I took a couple of spoonful for a “taste test” of course.

While waiting for the ganache to “cool”, I went to the computer and sure enough, Raymond had his post up.  And when I saw how pretty the lacquer finish looked, I got in my car and headed to the supermarket to get the gelatin.

By the time I came back, it was time to work on the biscuit.  I’m unrolled it, spread the Lekvar, which had a great consistency, then the apricot ganache.  Since we were going to eat this that night, I skipped the syrup.  Once done, I rolled up back up all snug and put it aside.

I went to town with the amazing lacquer glaze.  

This is one of those things that look really super complicated to make and it’s so outrageously easy, you wonder how in the hell you never tried it before.

You cook the sugar and water together until the sugar is dissolved, then you add the cocoa powder, the corn syrup and vanilla and whisk away, even at this point it starts to shine. There was a point where I questioned the reason behind the need to pour it through a sieve, not once but twice.  But, since this was the first time trying this I was not going to leave any wiggled room for errors.

I started to pour it over my now roulade and I realized that I had missed a step.  Yep, in all my excitement with the lacquer glaze, I realized that I had not crumb coated it with some of the apricot ganache.

Damn!

I resume and figure it would be ok.

And it was.  The end product looked glorious!  I wanted to own a bakery right there and there just so I can showcase for all to see and admired and oh and ahh over it.

I settled with the praises from Tom and the little man.

Verdit:

Tom: “It has a distinct taste that I never had before, but it’s delicious. Love the apricot jam, against the dark chocolate.  Was there left over apricot jam?”

Me:  Once more Rose made a believer in me.  Mixing fruit, in this case jam, with chocolate it’s not the end of the world at all.  But, a whole other dimension on flavor, one, that I obviously have to try more often.

Plus, how can you not be “wow-ed” by that finish?

Crabs cakes on the fly

I got home yesterday to find Tom on the breakfast table devotedly taking blue crab after blue crab and picking their luscious crabmeat out of the shells and into a pile on a side plate.

He looked at me and stated the obvious.

“I did the hard work, now it’s your turn to turn this crabmeat into a yummy delicious something for dinner.”

*gulp*!

Don’t get me wrong I love crab, and if the restaurant has it on the menu, then that will be my first choice - ok, maybe the lobster will be first choice, but, crab is sure high up there as my economical choice. Unless, they are stone crabs, then …

Wait! Were was I?

Oh yeah, our own crabs - compliments of the crabbing trip his visiting relatives did the day before. So we had about 20 or so crabs, which were supper fresh and ready for some magic.

The problem was that I was press for time, tired and in no mood to cook anything. But seeing that Tom had gone thru all the trouble of cleaning about 6 of those crabs, I just simply could not get away in bowing out.

So, I’m looking for something that will be quick, easy and fast?

What to do? What to do?

CRAB CAKES!

Except that the recipes that I had needed over 20 ingredients, 15 of those were nowhere to be found in my pantry or refrigerator, so we had to do this on the fly.

And you know, sometimes working on the fly is when creativity kicks in.  And in this case beautifully.

Ingredients:

2 tablespoons of Mayonnaise
1 large egg
1 teaspoon Worcestershire sauce
½ teaspoon of Dijon mustard
½ teaspoon of lime juice
2 teaspoon fresh Italian parsley and/or basil, roughly chopped
½ cup of breadcrumbs
1 teaspoon of Old Bay seasoning (optional)
½ pound of lump crabmeat, picked over for shells and cartilage
Salt and cracked pepper to taste
½ cup of panko breadcrumbs

½ cup (1 stick) unsalted butter if baking

½ cup of Olive oil if frying

In a flat dish, pour the ½ cup of panko and put aside.

In a deep mixing bowl, combine the mayo, egg, Worcestershire sauce, Dijon mustard, lime juice, chosen herb (I had basil and parsley so I did a bit of both) and the ½ of cup of breadcrumbs. 

Note: Our fresh blue-crabs was originally cooked with Old Bay seasoning, so I did not put more, but if your crab came from those store-bought containers, you may want to add it to give it a bit of and additional flavor punch.

Add the crabmeat to your mixture and fold, making sure not to break it too much.  At this point it should be wet, but be able hold when trying to form the patties. The patty should form easily and not be too sticky*.   Using a spoon (or ice cream scooper) take some of the mixture, put in your palms and form a ball, then flatten it about 1” thick, making sure it they are nice and round. 

*(If you put it on your palm and it’s too sticky – it means the mixture is too wet. Add a bit more of the breadcrumbs or panko  ... then try again.) 

Take the form cakes and roll into the panko crumbs until coated on all sides, put in a lined (with wax paper or silicone liner) baking sheet and chill for about 10-15 minutes or so (this will help in keeping it together if frying them).

After chilling them, take out and cook.

If frying them: Melt about 3-4 tablespoons of butter and about ½ a tablespoon of olive oil in a large nonstick skillet over medium heat.  Cook the crab cakes until golden brown, about 3 minutes on each side.

If baking them: Turn the oven to 375 degrees. Melt the butter in the microwave and brush the top of the crab cakes with the butter.  Bake until golden, about 12-15 minutes, turning them once at the ½ way point.

Serve with your favorite dipping sauce.

Last night we mixed a bit of mayonnaise, ketchup, lime juice and a 2 or 3 sprints of hot sauce and used this as our dipping sauce.