
ABC: All American Chocolate Cake with Divinity Frosting and Milk Chocolate Paint
After having crashed and burned on the last chocolate offering on my other baking clubs, this recipe, from the ABC choice of the month had a very high expectations even before I read the whole recipe.
My reasoning behind it was that after having baked four recipes from Flo Braker book none have disappointed me. So we were 4 for 4. Can we make five?
My first tip to you is this. Bake the cake a day ahead, while is NOT a complicated cake to make, and nowhere in the instructions does it tell you to do this, I’m going to highly recommend you do. The high crumb level on this cake will make frosting a bit of a mess. So I opted to make the cake a day ahead and place in the refrigerator to chill. When frosting time came, it was smooth sailing all the way.
The cake is pretty straight forward, what cough my eye right away and totally told me that I was going to love this cake, even before I made it was the fact that it calls for one full cup of coffee. And if there is anything that I love more is chocolate cake made with coffee.
The rest of the steps are pretty straight forward when it comes to putting a cake together. No complicated mixing here or multiple usage of bowls and equipment. You start by making the coffee, since it has to come to a lukewarm temperature (if you don’t want to use coffee, you can replace with water). Then melt the chocolate and put aside, Sift the dry ingredients and put aside, mix sour cream and vanilla and put aside, whip the eggs a bit and also put aside. Mix the brown and white sugars and you guest it, put it aside. By the time you finish you will have all of your ingredients patiently waiting in a neat row to be put together in one single 15 minute whipping fest.
Starting with the butter, whip until fluffy and light. Follow by the sugars, which are “poured” in and … what? Rewind! Here you take a second look at the recipe because, well, hello? Sugar is not a pourable ingredient… so you realized that someone in the publisher house made a bo-bo and left out the fact that what come next should be the melted chocolate and not the sugars.
No harm done, into the mix the melted chocolate goes. Then the sugars, next up the eggs, next up the dry ingredients, which get incorporate in 3 parts with the sour cream in 2 parts and once all that is done you start to see this thick dark chocolate batter.
You stop your beating, out of your mixture it goes, and grab the biggest spatula in your kitchen and slowly incorporate the coffee, thinning out the batter quite a bit.
I opted to bake them in two 9-inch pans (you can also use two 6x3). While the recipe did not call for it, I did circle my pans with cake strips (new habits are hard to break). And into the 350 oven they went, for about 35 minutes. Mine were NOT ready at the 35 minutes; in fact I had to cook them an additional 10 minutes for them to be all nice and done.
Out they go, and after about 10 minutes you remove them from the pan to sit in a rack until fully cooled off.
At this point I wrapped them up and place in the refrigerator overnight.
Next up is the Divinity Frosting. Which is your basic 7-minute frosting, or Italian meringue, or fluffy white frosting or whatever you call it - I’m partial to “Damn! Good Frosting!”
You cook your sugar with the water and light corn syrup until I boils away reaching the 240 degree mark in your candy thermometer. At the 225 mark, Flo lets you know that it’s time to start whipping your eggs whites with salt and the cream of tartar until they reach the stiff peak point. Then slowwwly and very careefulllyyyy add the very HOT syrup (allowing yourself a couple of swear words when you do get burn in spite of being extra careful during this step) until your eggs whites turn into this glossy, sticky yummy-ness.
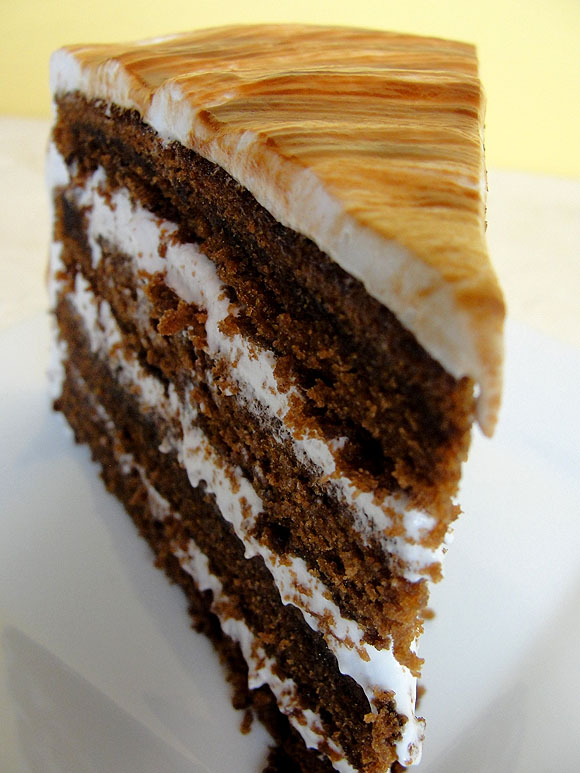
Put aside and get ready to frost away. I choose to cut my cakes in half, making it a 4-layer frosted cake – because we have establish that my cutting ability totally sucks, and I need all the practice I can get. I opted to take my cake cutter out of his dark hiding place and utilized for what it was intended, to make uniform, even cuts.
I made un-even and lopsided cuts. It’s official the cake cutter is broken.
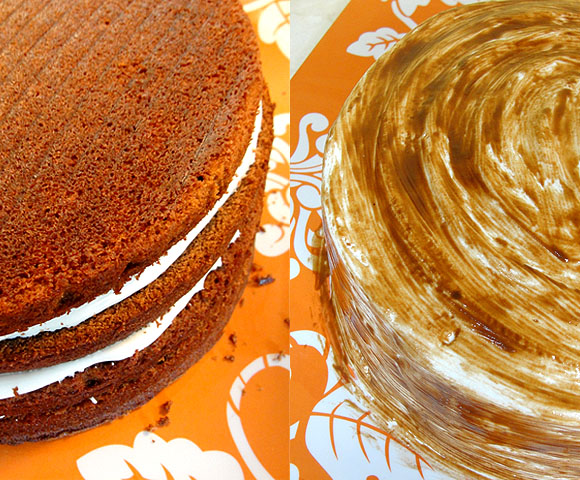
Regardless, I frosted away. And realized that my instinct of putting the cake in the refrigerator were spot on. Even cold, the crumbs were sticking to my frosting… but I piled on more frosting, there was plenty on the bowl.
Next up, you need to let it sit at room temperature for 2-3 hours until the frosting dries out. Because, if you are going to paint with chocolate you are going to need a dry canvas.
And this step is a piece of cake - ah ha! Bakers humor there.

Melt some milk chocolate with butter (I used the microwave) and then taking a pastry brush, paint away your cake. This was super fun to do, I wanted to get a streaky look and not completely covered it in chocolate.
Verdicts:
Tom: “I really like the texture, it’s not dry, but totally silky and almost brownie like. Love the coffee taste and its not super sweet either – it gets high points for that”
Co-workers: “Oh My god, this is good”, “Really, you baked this?”, “Can I totally take a second piece for later on tonight”, “Wait, what do you mean its gone?”.
Me: I really, REALLY like this cake. I been searching for that ideal chocolate/coffee cake and I think I have found it in this recipe. I also thought it was not overly sweet and had a great balance of the entire flavors, which if not done correctly can take this from a wow cake to a super-sweet mess.
This one goes in the baking rotation!
Note: you can find the chocolate recipe over at Scratch on this post and if you are interested in joining ABC, click on the badge on my side bar to get all the information and if you need the book, buy it here